Fastival collection setup.
At Konligo, we like to assist you any way we can. Please bear in mind that the pictures depicted in this setup tutorial are all of the Fastival dome. Yet the same technique applies when setting up the smaller domes from the Fastival collection: Arko290, Arko400 and Arko470.
Step 1: Releasing safety cable
Roll the structure to the designated place (for this: unlock the brake of the wheels) and loosen the long safety cable (which is around the structure).

Step 2: First opening of the structure
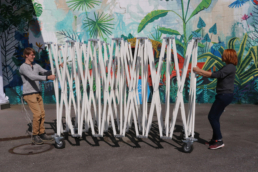
Pull the structure open with 2 (or with 4) persons. Open the structure as far as you can, until the structure is half open in a stable position.
Step 3: Where to open the structure
Position the team of 4 people exactly like in this picture: two persons at each side, one person per joint, being the third joint starting from the sides. In your case there will be no membrane as on the picture.
Step 4: Full opening of the structure
Push the structure upwards with 4 people along the arch side: first push the structure up (at the starting joints) and then go to the lower joint next to you to pull the structure inwards. It’s a combination of keeping the center of the structure high enough and pulling the sides inwards. Again, there is no membrane in your case.
Keep in mind that you need a larger space to deploy and open the structure than the ultimate span of the structure in open state (in total 10m for the Fastival, a bit less for the Arko’s)!
Step 5: Connecting safety cable
Connect the safety cable between the two middle ground joints, at the eye bolts with the carabiner hooks. If the span of the structure is too big for the safety cable, you should push the sides of the structure more inwards, until the safety cable fits.
When someone installs the safety cable, make sure that two other persons hold the structure in place so that it cannot close back down.
Step 6: Removing the wheels
Remove the wheels on the 4 ground joints.
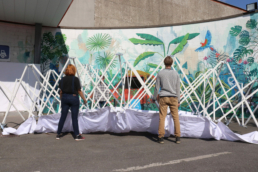
Step 7: Installing the banners
Install the banners on the locations where necessary with the elastics provided.
Step 8: Installing the connection pieces
This step only applies to those setting up the Fastival L.
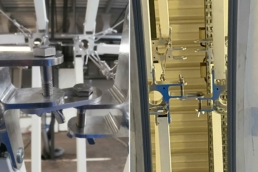
First set up both structures separately and bring them as close together as possible. In the best scenario (first picture) the fins of the joints are (almost) touching each other. Sometimes this may not be possible (see second picture). Then attach the connection pieces by connecting the fins of the two joints concerned. For the Fastival, do this at 5 locations on the structure (so not at the level of the two ground joints).
Make sure you connect the pieces in the right way as shown in the picture.
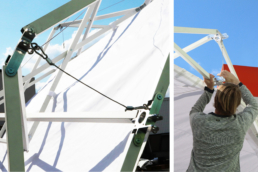
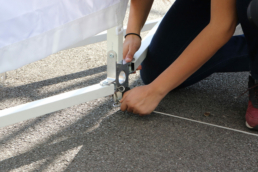
Step 9: Attaching the locking cables
When removing the safety cable and/or when expecting high winds.
Attach all locking cables (on both sides of the structure). If they seem too short, then push the lower joint upwards to reduce the distance. Use a ladder where necessary.
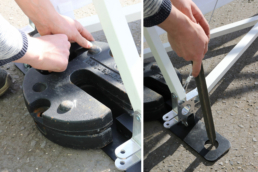
Step 10: Installing the feet plates
Place the ground joints on the feet plates (there are 6 plates). One person should lift the structure a bit while the other one can install the footplate by positioning the joints over the holes. Move the joint to find a corresponding hole and fix it with the clevis bolt and pin.
If you have the version with the position pins, you can tighten the pins in the bolts. The ballast weights are placed over these position pins to block the lateral movement and position of the weights.

Step 11: Removing the safety cable
Step 12: Installing ballast weights or anchors
Anchor the structure by putting the necessary ballast weights on the feet (when the structure is on hard underground). If the structure is on grass or soil, you can additionally use ground anchors through the big holes of the feet plates.
The total amount of ballast weight depends on the expected wind speed and extra loading of the structure: follow the instructions of the provided load bearing sheet.
Closing the structure.
Simply follow the steps mentioned above in the opposite order. But be mindful of the following hazards:
- When folding back your structure, make sure the brakes on the wheels are loose.
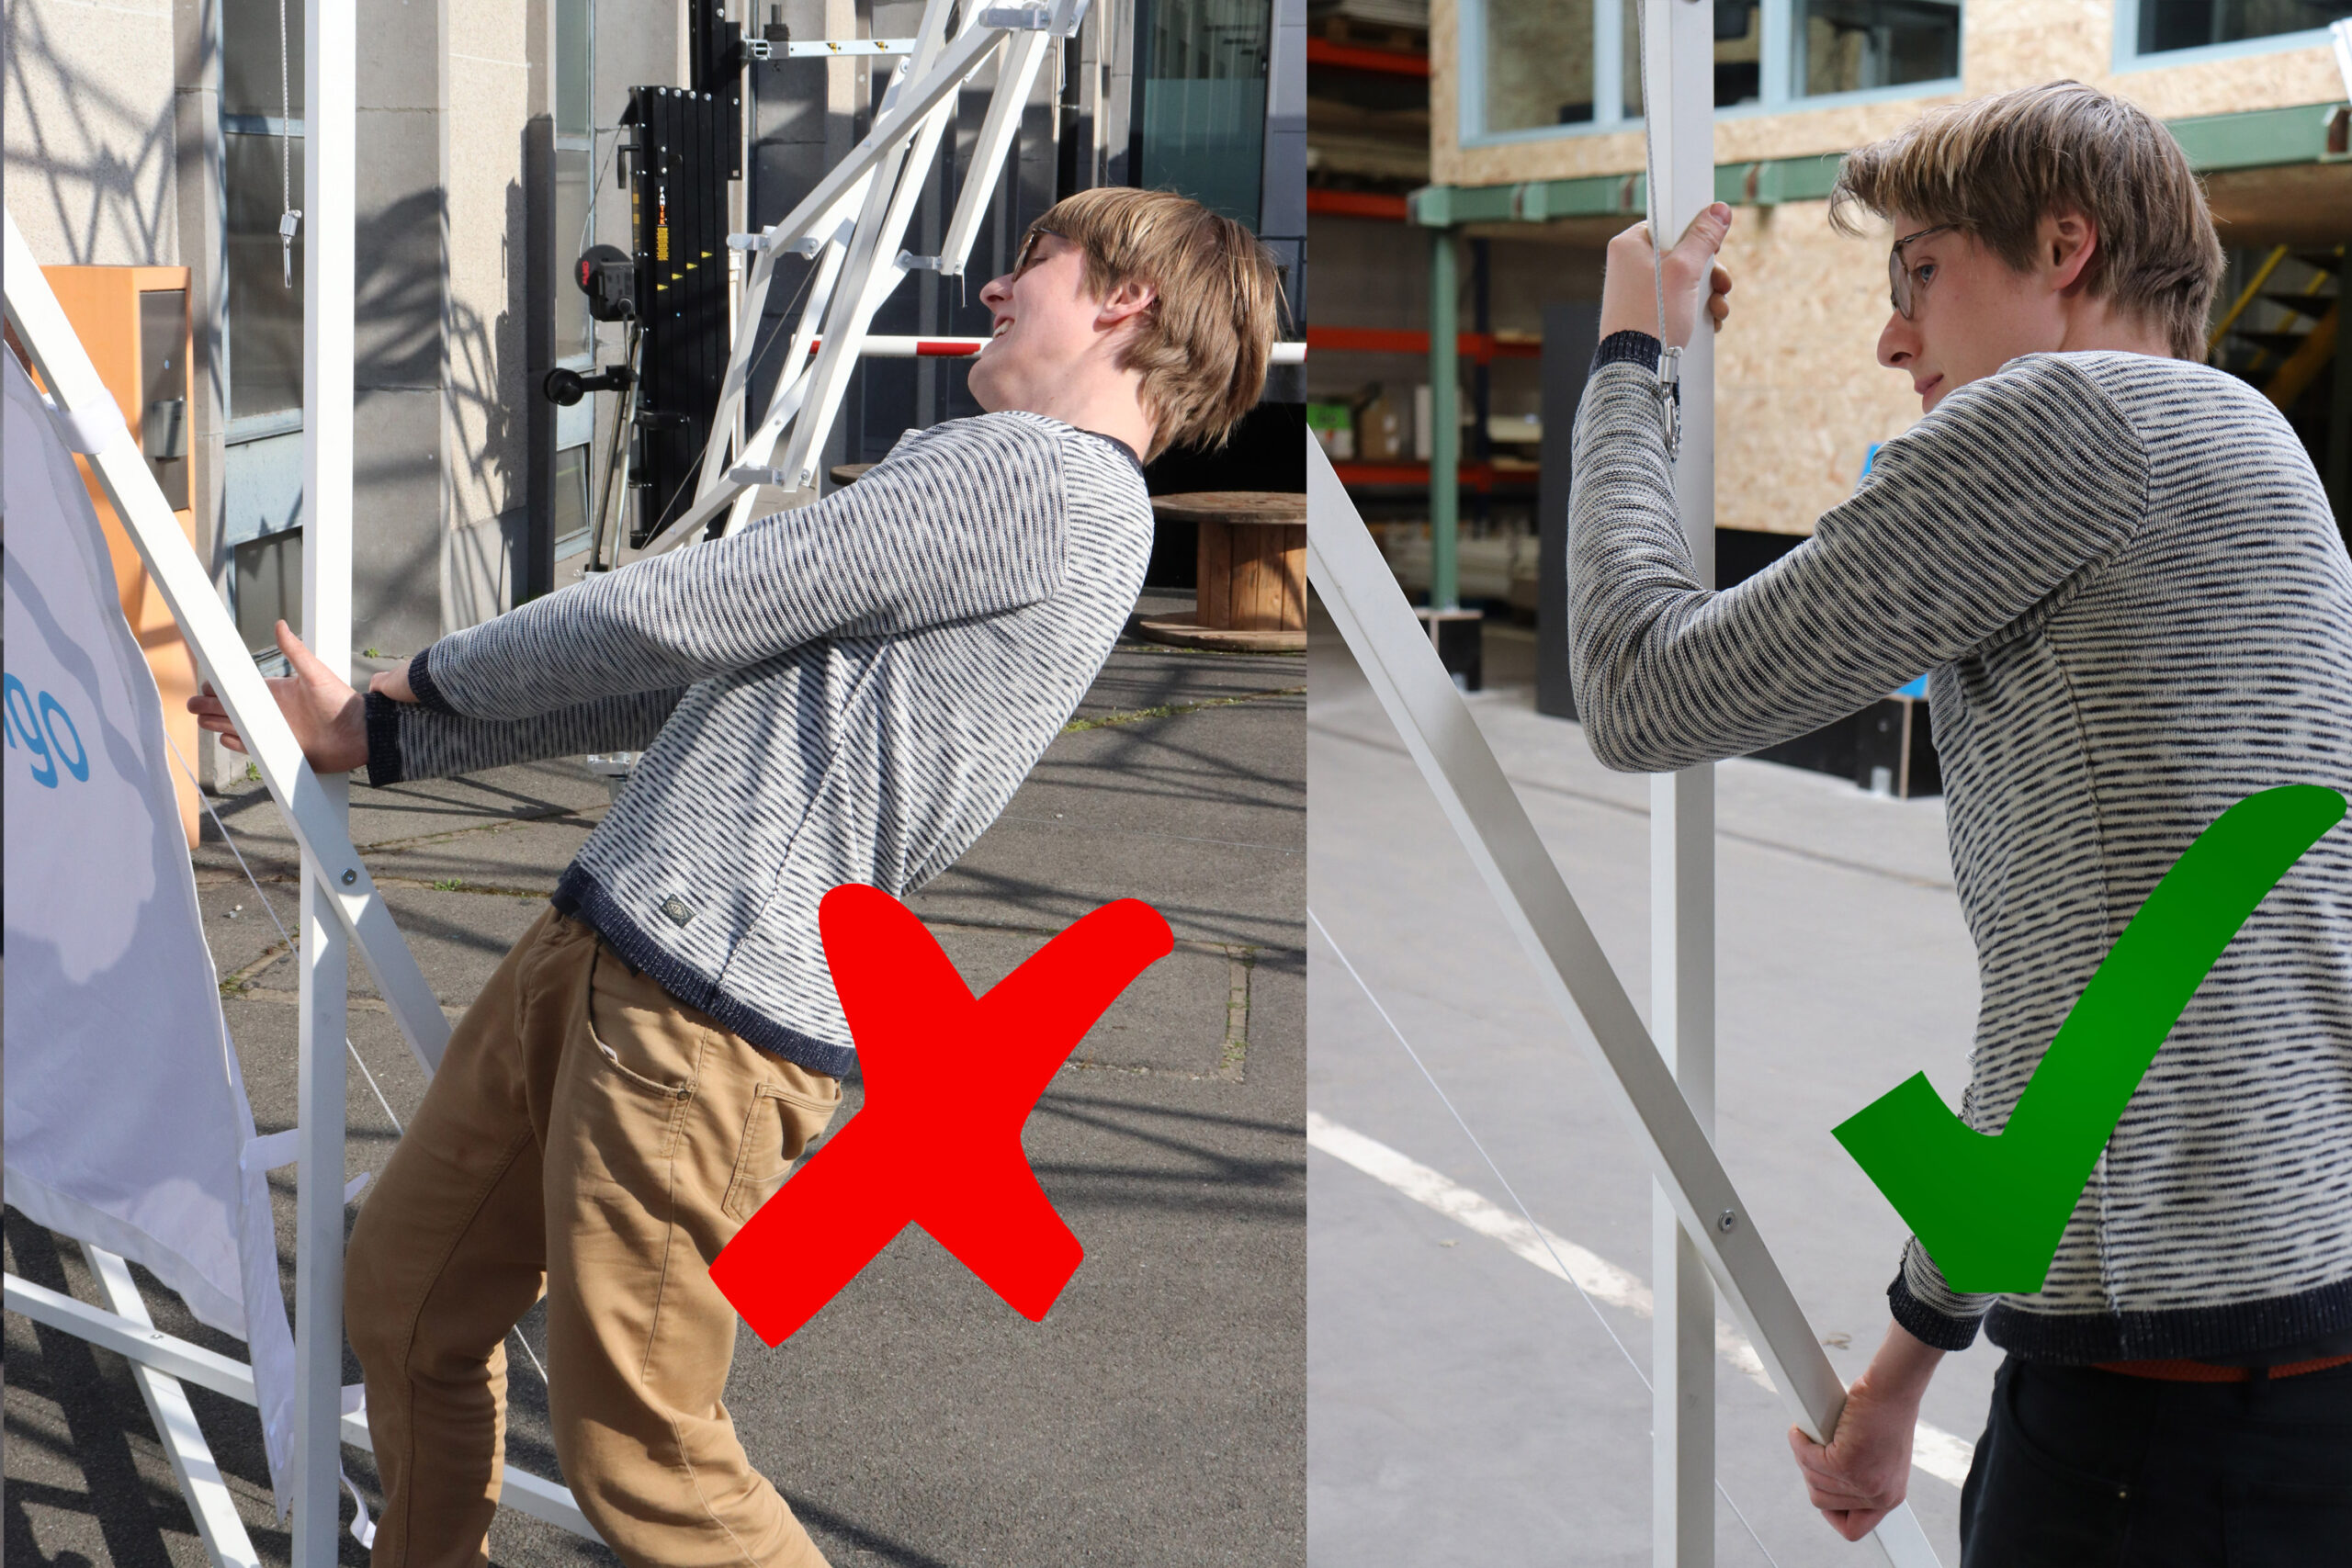
- Be aware of your hand positioning: hands should be kept at the outside of the structure in order for them not to get squeezed in between the beams.
- When closing the structure completely, keep your hands at the outside of the top joints.